Budget Bathroom Makeovers (before/after inspiration)
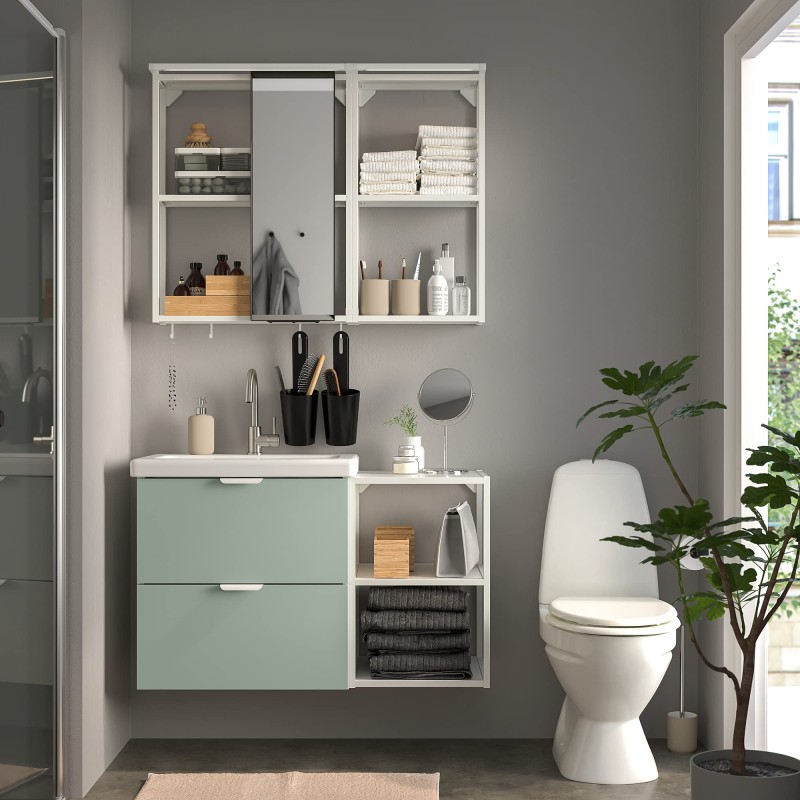
IKEA
A bathroom can look tired long before it stops working. The good news is you don’t need a full renovation to get that “after” feeling. A budget bathroom makeover is mostly about small, visible updates that clean up the edges and modernise the details.
This post is built like a set of before and after ideas you can copy over a weekend. Think paint, lighting, fittings, storage, and simple styling. Nothing fancy, just changes that show up in the mirror (literally).
You’ll also get a clear way to set costs, simple steps that keep things moving, and the common mistakes that make budget fixes fail early. Prices vary by region and finish, but the method stays the same.
Your home is your sanctuary, and giving it a beauty makeover does not have to cost a fortune. By room, it’s possible to do this on £50 to £100 if you have few resources, using a bit of innovation, second-hand finds and rearranging furniture.
Bath Safety Tips (for adults and children)
Run warm water first, then add hot water and test with your hand.
- For babies, NHS has a midwife’s video (never leave children alone and run cold water first, testing with your wrist or elbow, keeping babies’ heads out of the water).
- Don’t bathe straight after feeds (or if hungry/tired) and avoid baby oils, cotton buds (the cause of nearly all ear infections) and talcum powder (linked to ovarian cancer).
- Read posts in our bathroom tag for more information and ideas!
Before painting, remove and recycle clutter, and give it an eco deep clean (choose unscented products for pregnancy/nursing and near babies/children). Open the window if safe to do so, then leave things to air out and dry, so you have a clean slate from where to start.
Bright white often can look start, but off-whites are nice for small bathrooms, then choose a couple of accent colours, to blend with the accessories you intend to choose.
Fresh natural paint is the quickest way to lift a tired bathroom. Some people prefer light and fresh bathrooms (so choose blue or green to match the sea), others prefer darker and warmer colours, like mustards or orange.
Be sure to choose paint for bathrooms, so it is easy to clean. Before painting, be sure to sand flaking spots and fill nail holes etc, and clean mould with a white vinegar solution.
Here are a few ideas from eco-friendly brand Graphenstone paint:
Refresh Tiles with Primer & Paint
You can change tiles, but often it’s simpler to just paint them on a budget. Ensure tiles are squeaky clean before you begin, by using sugar soap or a degreasing cleaner to remove soap scum and grime.
Invest in some nice organic cotton fluffy towels, and a few luxuries like stone bath mats (won’t slip and last forever).
Photos are likely not good for bathrooms as the humidity could ruin them, but you could display a couple of framed pretty pictures to inspire.
Add a wicker basket full of recycled paper toilet rolls and indulge in a few quality eco bathroom beauty products, and recycle empty bottles at kerbside or at your local Boots store.
Read our dental posts to find eco toothbrushes and toothpastes (never use xylitol brands near pets).
Do a 10 minute bathroom audit
Set a timer and look at the room like a guest would. Start with what’s dated (colour, finishes, fittings), then what’s damaged (chips, rust, leaks). After that, check what’s just dirty.
A quick checklist helps:
- Clean-up wins: descale taps and showerhead, scrub grout, clean extractor cover, polish mirror edges.
- Fixable edges: re-grout small gaps, re-seal silicone, tighten loose handles, touch up skirting.
- Replace if needed: dripping tap cartridges, cracked toilet seat, broken light shade, swollen MDF cabinet doors.
Finally, take photos from three angles (doorway, sink, shower or bath). Those angles also show clutter and odd gaps that your eyes ignore.
Set a realistic spend and timeline
Pick one change that does most of the visual work. That’s your “hero”. It could be a larger mirror and better light, a painted vanity, or a new tap that updates the whole sink area.
A simple budget split keeps it grounded:
- About 60% on the hero item (mirror, light, tap, or vanity front update).
- About 40% on basics (bathroom paint, primer, mould-resistant silicone, fixings, a couple of accessories).
For a weekend-friendly sequence, go in this order: prep and deep clean, then repair and seal, then paint, then fit and style. If electrics sit in the plan (new light fitting, moving switches), call a qualified electrician. Likewise, don’t move pipework as a “quick” job. Swap what’s there, and keep it simple.
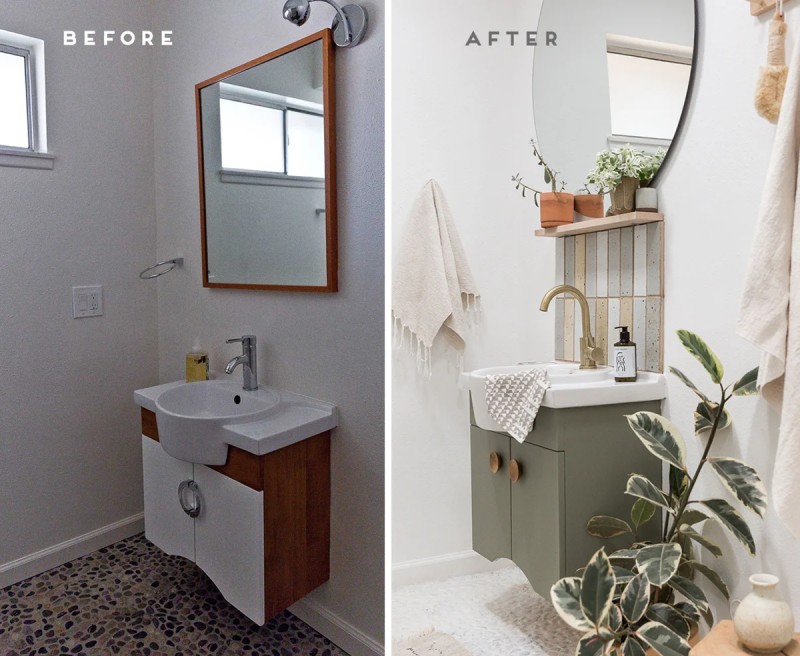
Paint and hardware swap, the fastest way to modernise tired units
Before: a dull cabinet, mismatched handles, and scuffed edges that make the whole room feel older.
After: a fresh wall colour or painted vanity, matching handles, and crisp lines around trim.
Use moisture-resistant bathroom paint, and don’t skip primer on glossy or laminate surfaces. A light sand helps paint grip, so it doesn’t peel later. Keep finishes limited to two or three (for example, chrome plus white, with one wood tone). Add small soft-close bumpers to stop doors clacking and chipping paint.
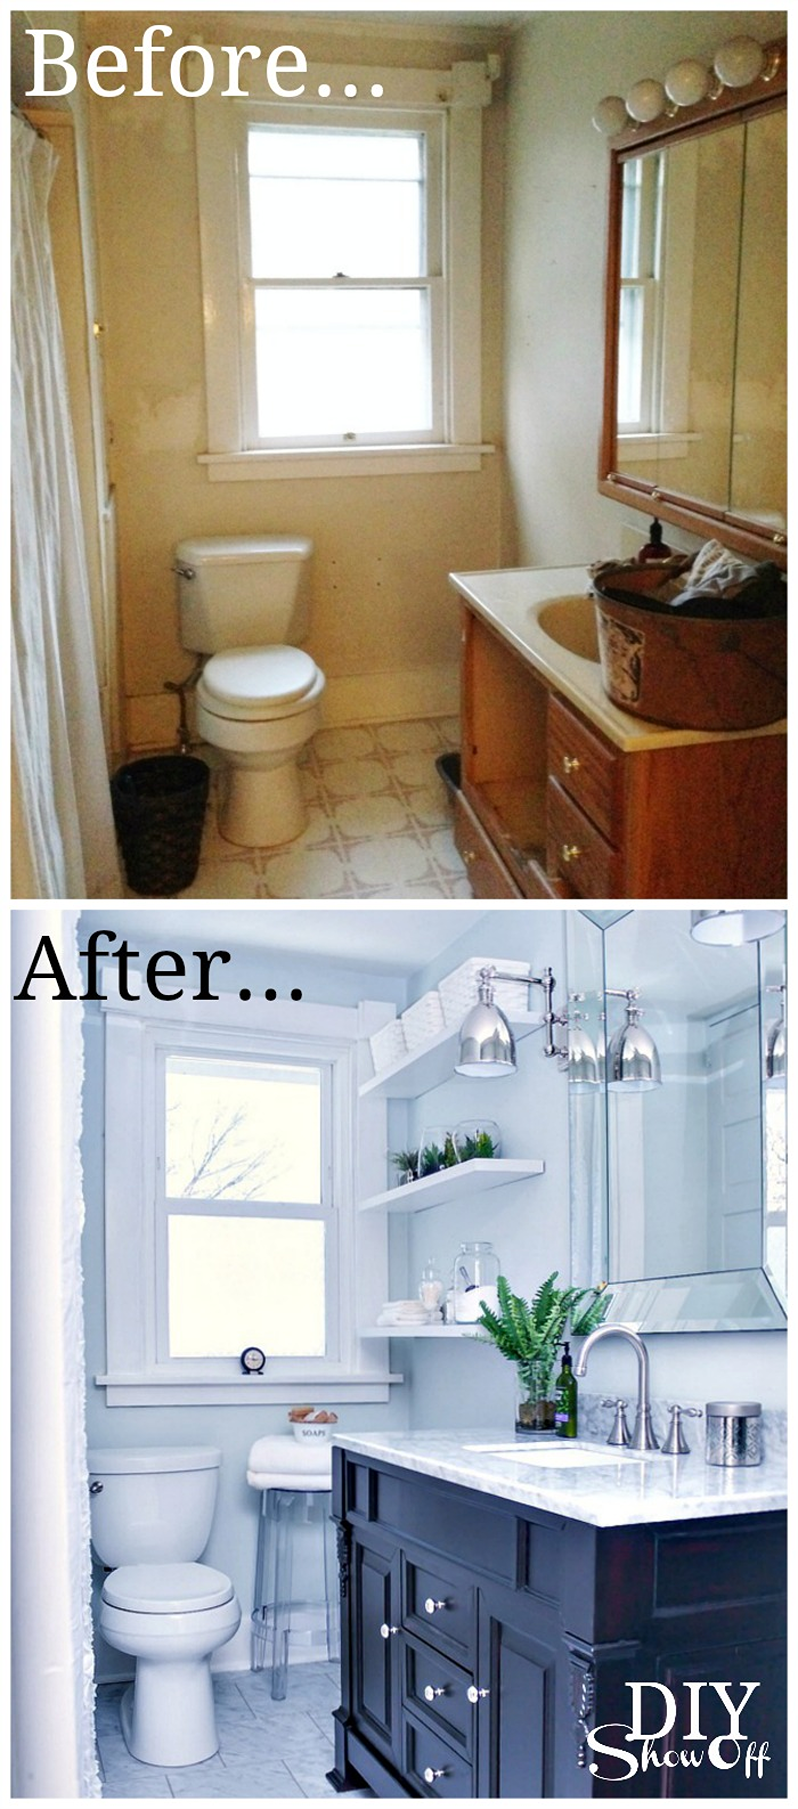
Mirror and lighting upgrade, the ‘wow’ change that makes bathrooms feel larger
Before: a small mirror, harsh ceiling light, and shadows around the sink.
After: a larger mirror, warmer LED light, and a brighter face area, so the room feels calmer.
A bigger mirror bounces light and makes the wall feel wider. Rounded corners also soften a boxy layout. For lighting, look for IP-rated fittings (bathrooms have zones, and fittings need the right rating for where they sit). If you’re not sure, keep the change simple, like swapping a shade or using a suitable, safely placed plug-in light outside splash areas. When in doubt, get an electrician.
Grout, sealant, and tap refresh, the before and after that looks like new tile
Before: yellowed silicone, patchy grout, limescale marks, and a tap that drips.
After: crisp grout lines, fresh silicone beads, and clean, shiny metal that looks cared for.
Remove mould properly before re-sealing, otherwise it comes back. Let everything dry fully, then apply mould-resistant silicone in steady lines. A grout pen can help for small touch-ups, but it won’t rescue large, crumbling areas. If your taps still look fine, add a water-saving aerator instead. It’s a small cost, and it can make the flow feel more controlled.
Peel and stick upgrades that look high end when you use them in the right places
Before: a plain splash zone, dated vinyl, or a boring vanity front.
After: a simple feature area that reads like a bigger upgrade.
Peel and stick works best on smooth, clean surfaces and in low-splash zones, like behind the sink or on cabinet doors. Avoid putting it inside a shower area or anywhere water sits. Prep matters more than the product: degrease first, smooth rough patches, and press it down with a roller or cloth to avoid bubbles. Seal exposed edges where needed, so steam doesn’t start lifting corners.
Storage and styling, the ‘after’ photo secret for small bathrooms
Before: cluttered sink, bottles everywhere, and towels with no home.
After: clear surfaces, simple storage, and a room that feels intentional.
Add one wall shelf, or a slim cabinet, then group daily items in a basket. Hooks help more than people expect, especially behind the door. Keep styling rules basic:
- Hide daily clutter (a tray is fine, a pile isn’t).
- Repeat one metal finish (don’t mix five).
- Add one soft texture (fresh towels, or a washable mat).
For renters, over-door hooks and tension poles give storage without drilling.
Don’t skip prep and ventilation
Paint and adhesive hate residue. Soap film and limescale act like a barrier, so finishes peel or lift. Clean with sugar soap, treat mould, rinse well, and let the room dry before you seal or paint. Sand gloss where you need grip, especially on old woodwork.
Ventilation matters just as much. Run the extractor during showers, then keep it on for a while after. If you don’t have one, crack a window and leave the door ajar. Also check for slow leaks first, because decorating over damp is a short story with a bad ending.
If something feels damp, wait. Dry time is cheaper than doing it twice.
Don’t buy the cheapest option in the wrong spot
Spend where water and heat hit hardest. A decent tap, a suitable light fitting, bathroom paint, and mould-resistant silicone tend to pay you back in fewer repairs. Save on accessories, simple shelves, hooks, and even a mirror frame you can DIY.